
How to Fix a Dripping Faucet Without Getting All Wet
How to Fix a Dripping Faucet
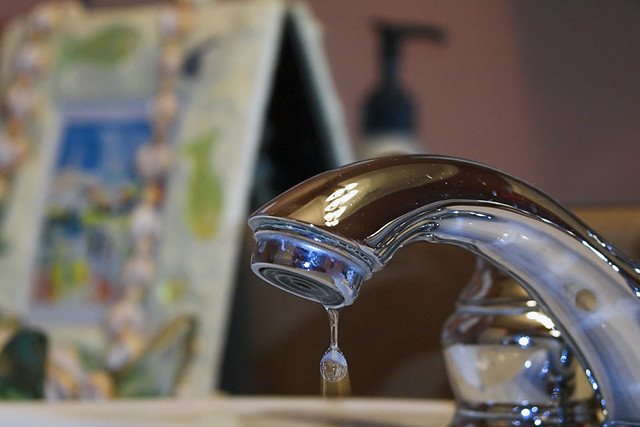
If you own a home long enough, something will inevitably break, wear out or need repairs. One of the more common issues in homes of any age is a dripping faucet. Thankfully, learning how to fix a dripping faucet takes little effort and no prior experience with plumbing.
We’ll show you how to fix a dripping faucet with our step-by-step guide, explain the causes of faucet leaks and explore a non-DIY alternative in the following sections:
What Causes Faucet Drips or Leaks?
As is often the case with home repair projects, there is more than just one reason that your faucet could be dripping. Here are some of the common causes for a leaky faucet:
A damaged cartridge: A cartridge is a component found in faucets that have a two-handle design. It controls how much water, and what kind of water, flows out of the faucet itself. When damaged, it can allow water to flow through without the handle being in the proper position, causing a dripping tap.
Deteriorated valve seat: A valve seat joins the faucet to its spout. A valve seat tends to deteriorate over time due to sediment buildup, which can ultimately lead to a leaky faucet.
Water pressure: If your dripping faucet only leaks at certain times of day, then chances are that it’s a water pressure issue in your home.
Broken washers: Broken washers are one of the more common causes of a dripping tap. Over time, faucets cause friction between the washer and the valve seat. Once the washer is sufficiently worn, it can lead to leakage.
Tools to Fix Your Leaky Faucet

Always make sure you prepare before doing any DIY project. We’d hate for you to get halfway through fixing your leaky faucet before realizing you don’t have the right tools and materials on hand. To make sure that doesn’t happen, here’s a list of some tools that may be useful:
Adjustable wrench: An adjustable wrench is a must for any homeowner. During sink repairs, it can help you undo tight screws of almost any size.
Channel-lock pliers: Channel-lock pliers are a type of plier that can adjust its grip size by sliding up and down a channel. They are great for grabbing things that require a tight grip and can even be used in lieu of a wrench if necessary.
Set of Allen keys: Allen keys are L-shaped hexagonal wrenches of varying sizes. Many manufacturers use Allen key compatible screws, making them a worthwhile addition to your toolkit.
Flathead screwdriver: Flathead screwdrivers end in a single flat line, and are used to drive compatible screws into wood and other materials.
Phillips-head screwdriver: Phillips head screwdrivers perform the same function as flathead screwdrivers, but end in a narrow plus-sign shape in order to drive other screws. This screw head type tends to provide better grip.
Utility knife: A utility knife is useful for any homeowner and can be used for a huge variety of tasks. When it comes to sink repair, the knife can be used to undo plumbing tape, remove rubber seals and more.
Materials
Replacement faucet cartridge (if needed): If you’ve diagnosed that your sink’s faucet cartridge is broken, then you’ll need a new one on hand to replace it.
Silicone faucet grease: Silicone faucet grease is used to lubricate faucet cartridges, valves and stems for installation.
Kit of assorted stem washers and screws: While you may not always need this item for a faucet repair, it’s always a good idea to have assorted washers and screws available in case the need for them arises.
Steps to Fix a Leaky Faucet

1. Turn off your water supply: Open up the area under your sink and locate a shutoff valve. Once located, turn the valve to shut off the flow of water to your faucet. Afterwards, turn on the faucet and allow it to empty itself of water. If there is no shutoff valve on your sink, shut off the house water supply and then empty the faucet of water.
2. Detach your sink handle: Some sink handles can be pulled off without any tools, but others require a bit more work. If your faucet handle does not remove easily, it likely has a set screw. To remove the handle, locate the set screw and remove it using an Allen wrench or Phillips head screwdriver. The screw may be hidden under a cover, which can be lifted with a flathead screwdriver. After removing the screw, pull the handle off.
3. Remove stem or cartridge: Use an adjustable wrench to loosen the packing nut inside of the handle assembly. After removing it, lightly pull on the old cartridge to remove it.
4. Replace O-ring and washer: Remove the existing O-rings from the now exposed valve body. Replace the O-rings with new ones. Locate the washer on the valve body and exchange it for your replacement part.
5. Install new cartridge: If the cartridge was the cause of your leaky faucet, disregard the previous step and install an entirely new cartridge in place of your old one. You may need to apply silicone faucet grease in order for the cartridge to slip into place easily.
6. Reattach sink handle: Perform the detachment process in reverse. Place the handle or handles back on your sink and push down firmly to ensure they are secure. If your sink handle has a set screw and screw cover, replace those items and ensure they are screwed in tightly.
Or, Have a Handyman Fix Your Faucet
So, now you know how to fix a dripping faucet, but that doesn’t necessarily mean that you want to do it. If you’d prefer to have someone else come and fix your leaky faucet, then you’re in luck. Our home warranty includes access to affordable handyman services from Porch. Now, you can relax and have an expert take care of your plumbing issue!
Interested in handyman services or other home warranty benefits? Get a quote today to see how American Home Protect can help you protect your home.
Dripping Faucet FAQs
What causes a tap to drip?
A dripping faucet can be caused by several different things. Some of the most common causes are a damaged cartridge, a deteriorated valve seat, water pressure issues and broken washers.
How easy is it to fix a dripping faucet?
Fixing a dripping faucet is often very simple and can be completed on your own. The main exception to this rule is if the leak is caused by a water pressure issue, in which case you will want to have a professional plumber come and investigate.
Is a dripping tap an emergency?
A dripping tap is not necessarily an emergency, but it should be fixed as quickly as possible. If you have drainage issues, a dripping tap can lead to minor flooding, which can become expensive quickly. Additionally, a dripping tap wastes water and can deteriorate your sink bowl if left unattended for a prolonged period of time.
Does a home warranty cover a leaky faucet?
Home warranties do not tend to cover leaky faucets. However, our home warranty does come with access to handyman services. If your faucet is dripping and you cannot fix it on your own, or wish to have a professional look at the issue, then you can call a handyman to come take a look and repair your dripping tap.